Connecting a Webhook:
- Accessing Webhook Settings:
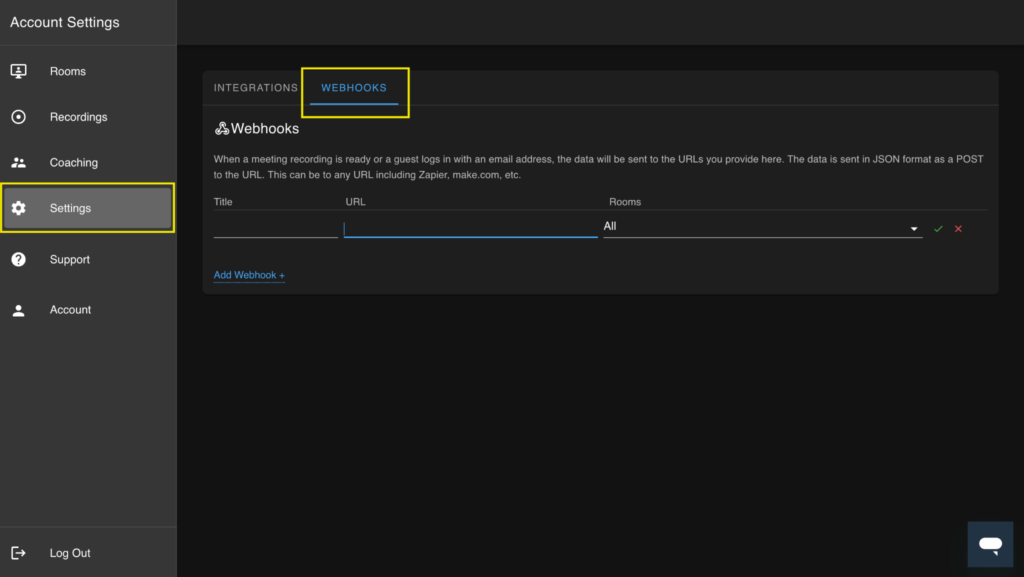
- Navigate to the “Settings” tab in the left-hand menu.
- Select the “Webhook” tab

- Creating a Webhook:
- Enter a title for your webhook.
- Insert the URL in the “URL” line.
- Selecting Room Recordings:
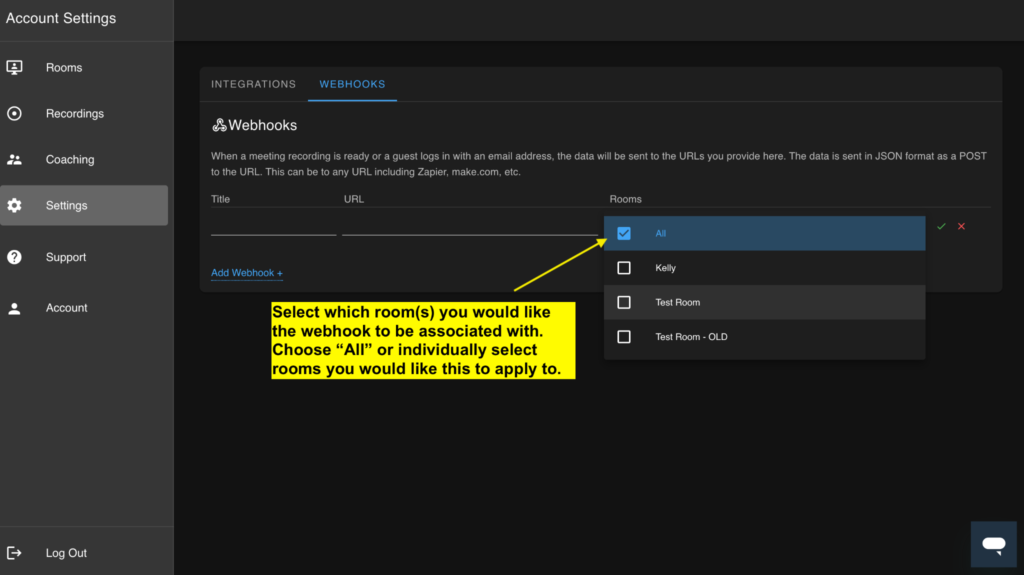
- Choose which room recordings the webhook will correlate with:
- Select “All Rooms” to apply the webhook to every room.
- Choose multiple rooms by clicking the check mark next to each room name.
- Select a single room by clicking the check mark next to its name.
- Choose which room recordings the webhook will correlate with:

- Webhook Functionality:
- The webhook will send the email address used for the meeting and the URL for the recording to be downloaded.
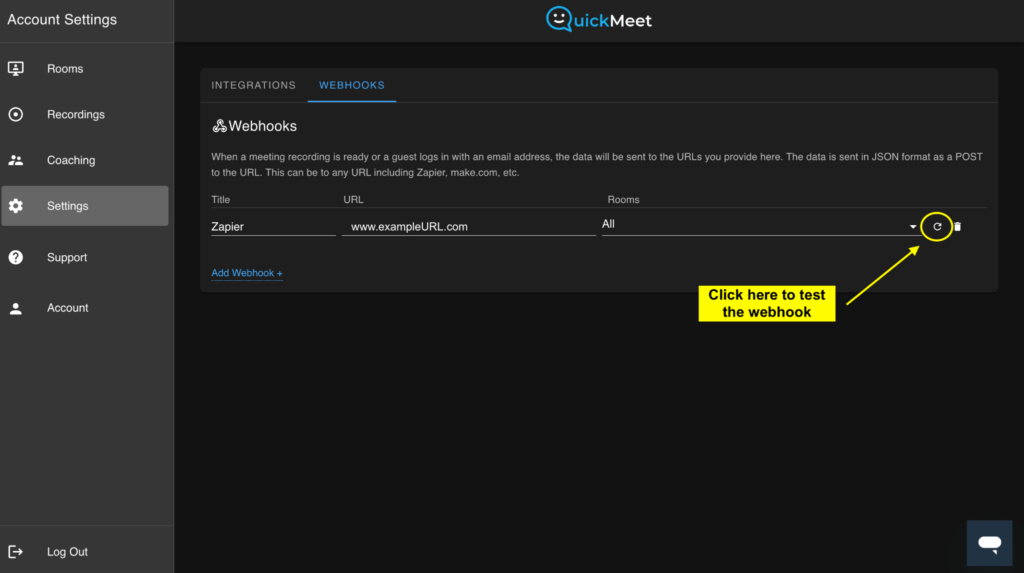
- To test the webhook, click the rounded arrow at the end of the webhook line.

Connecting a Webhook to Zapier:
- Log in to Zapier:
- Ensure you have a Zapier account and log in.
- Create a New Zap:
- Click “Make a Zap” in the top right corner of the Zapier dashboard.
- Select Webhooks by Zapier:
- Choose “Webhooks by Zapier” as the trigger app.
- Select “Catch Hook” as the trigger event.
- Copy Webhook URL:
- Zapier will provide a unique webhook URL. Copy this URL.
- Add Webhook to QuickMeet:
- Go back to QuickMeet’s “Webhook” settings.
- Paste the Zapier webhook URL into the “URL” line.
- Test Webhook:
- In Zapier, click “Test Trigger” to ensure the webhook is set up correctly.
- In QuickMeet, trigger an event to test the webhook.
- Set Up Actions in Zapier:
- Choose the action app in Zapier (e.g., Google Sheets, Slack, Email).
- Configure the action to process the data sent from QuickMeet.
- Finish and Activate:
- Once everything is set up, click “Turn on Zap” to activate the webhook integration.
Note:
- Ensure you have the correct URL and room selection for the webhook in QuickMeet.
- Testing the webhook helps confirm that data is being sent correctly to Zapier.
For any assistance or inquiries, contact our support team at support@quickmeet.online
